In Milo you create an invoice in a few steps: you choose a customer, add lines and let Milo calculate the VAT and totals. The invoice starts as a Draft, so you can check it calmly before you send it.
Starting a new invoice
Go to Invoices and click Create invoice. From the dashboard you can also use the New invoice button.
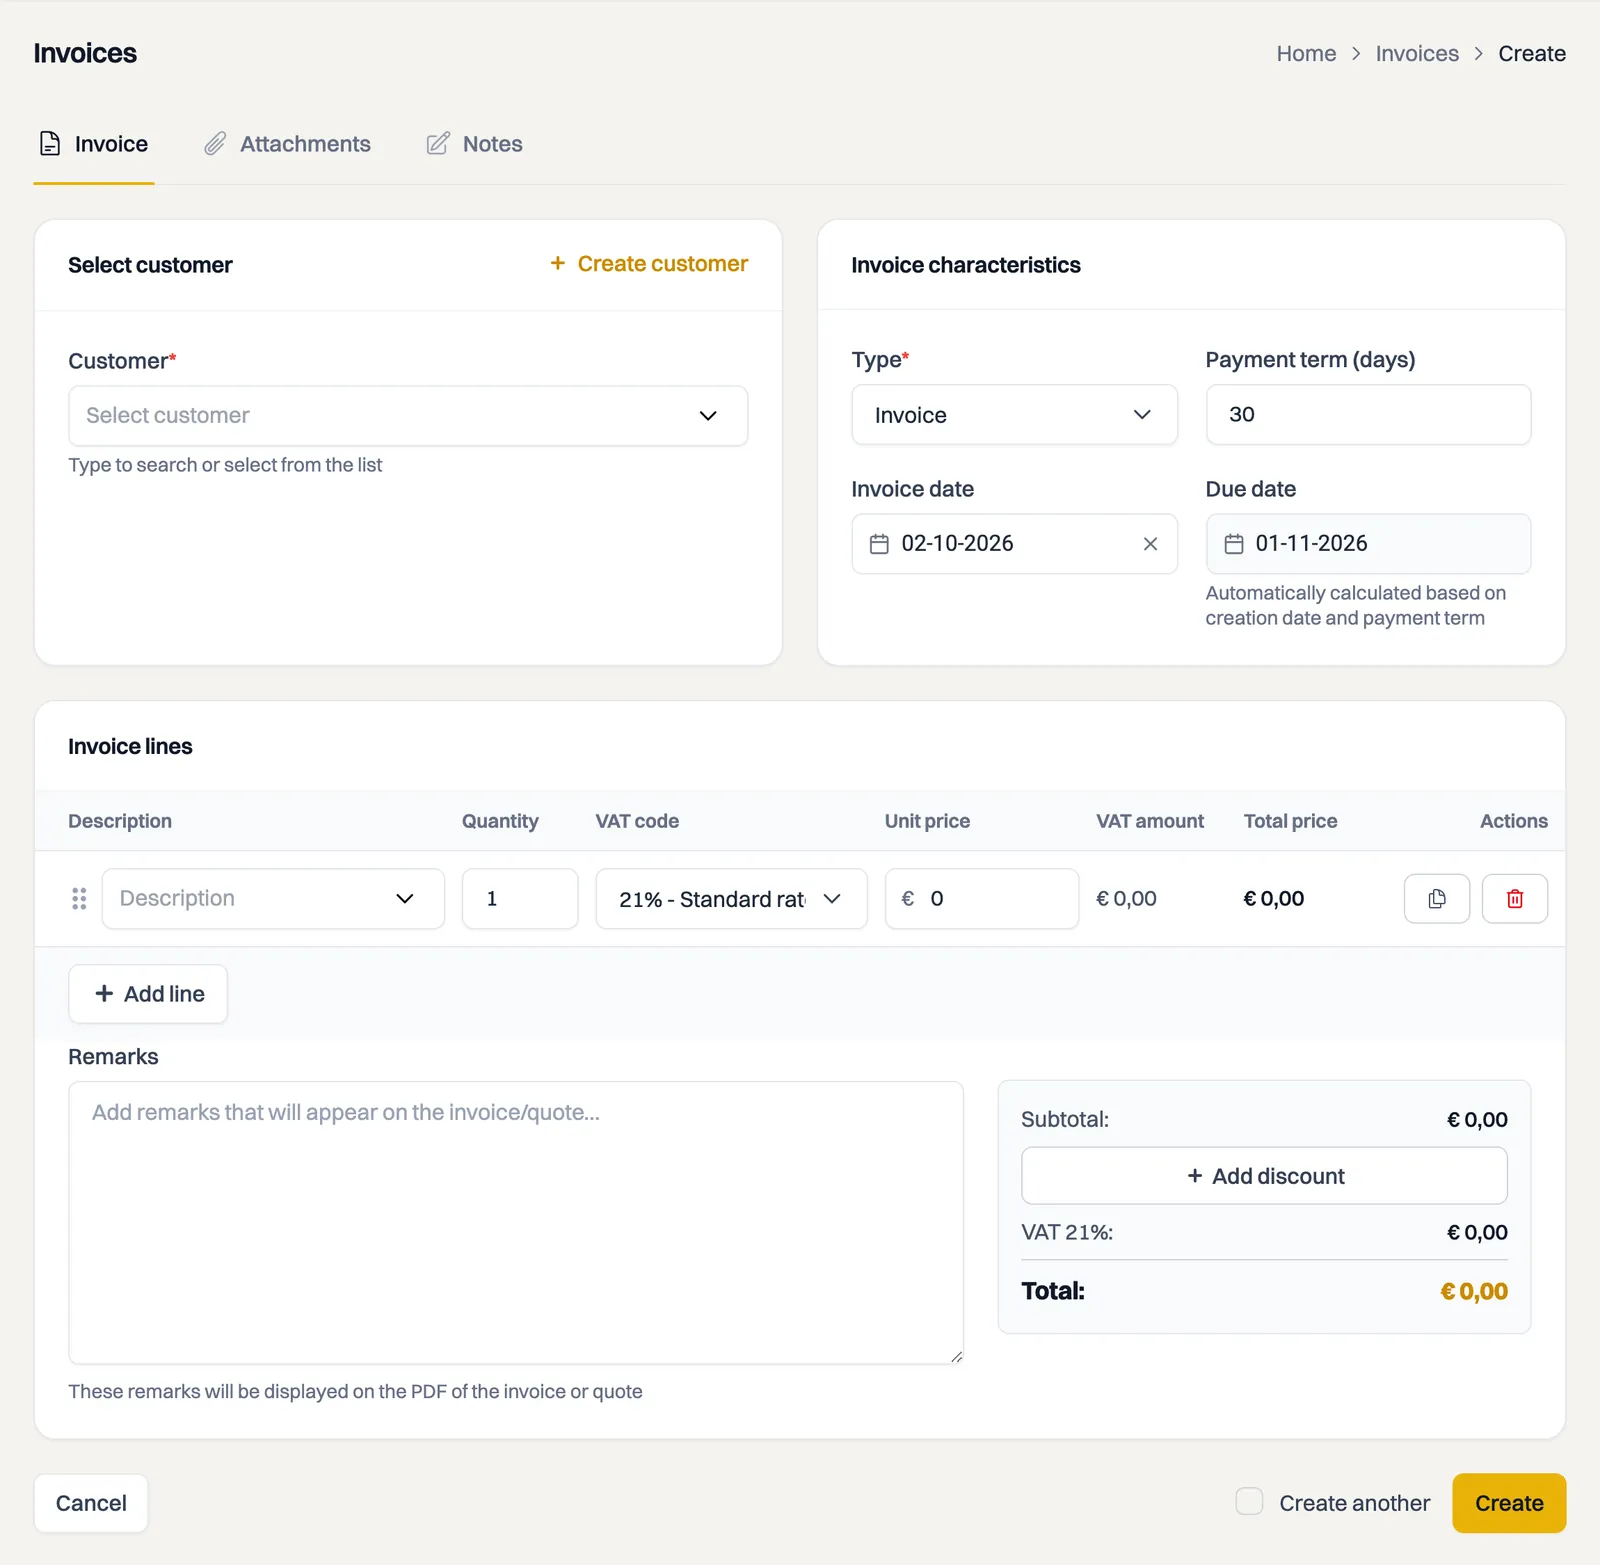
Choosing a customer
Under Customer, choose the customer the invoice is for. You search by name or select from the list. If the customer does not exist yet, click Create customer. After your choice Milo shows the customer details, so you can see you have the right customer.
Setting the invoice details
On the right you set the details:
- Type: usually "Invoice".
- Payment term (days): the number of days within which the customer has to pay. Milo fills in the term of the customer or your company.
- Invoice date: today by default. Milo does not accept a date in the future: the invoice date decides which VAT period the invoice falls in, and that period has to exist already.
- Due date: calculated automatically from the invoice date and the payment term.
Adding invoice lines
Add a line for each service or product:
- In Description, type what you are charging. As you type, Milo suggests matching catalog items; choose one and the price and VAT code are filled in.
- Enter the Quantity.
- Choose the VAT code, for example 21% - Standard rate. Milo already proposes one based on your customer, and you can choose a different one per line.
- Check the Unit price. Milo automatically calculates the VAT amount and the Total price per line.
With Add line you add more lines and with Add discount you apply a discount. You can also put logged hours from time tracking onto an invoice as lines.
Remarks and totals
In the Remarks field you put text that appears on the PDF of the invoice. At the bottom right you see the Subtotal, the VAT and the Total. A rate above 0% is shown as VAT 21%. At 0% you see the name of the VAT code, for example VAT reverse charged. The article on VAT on invoices covers which VAT codes there are and how Milo proposes them.
Saving the invoice
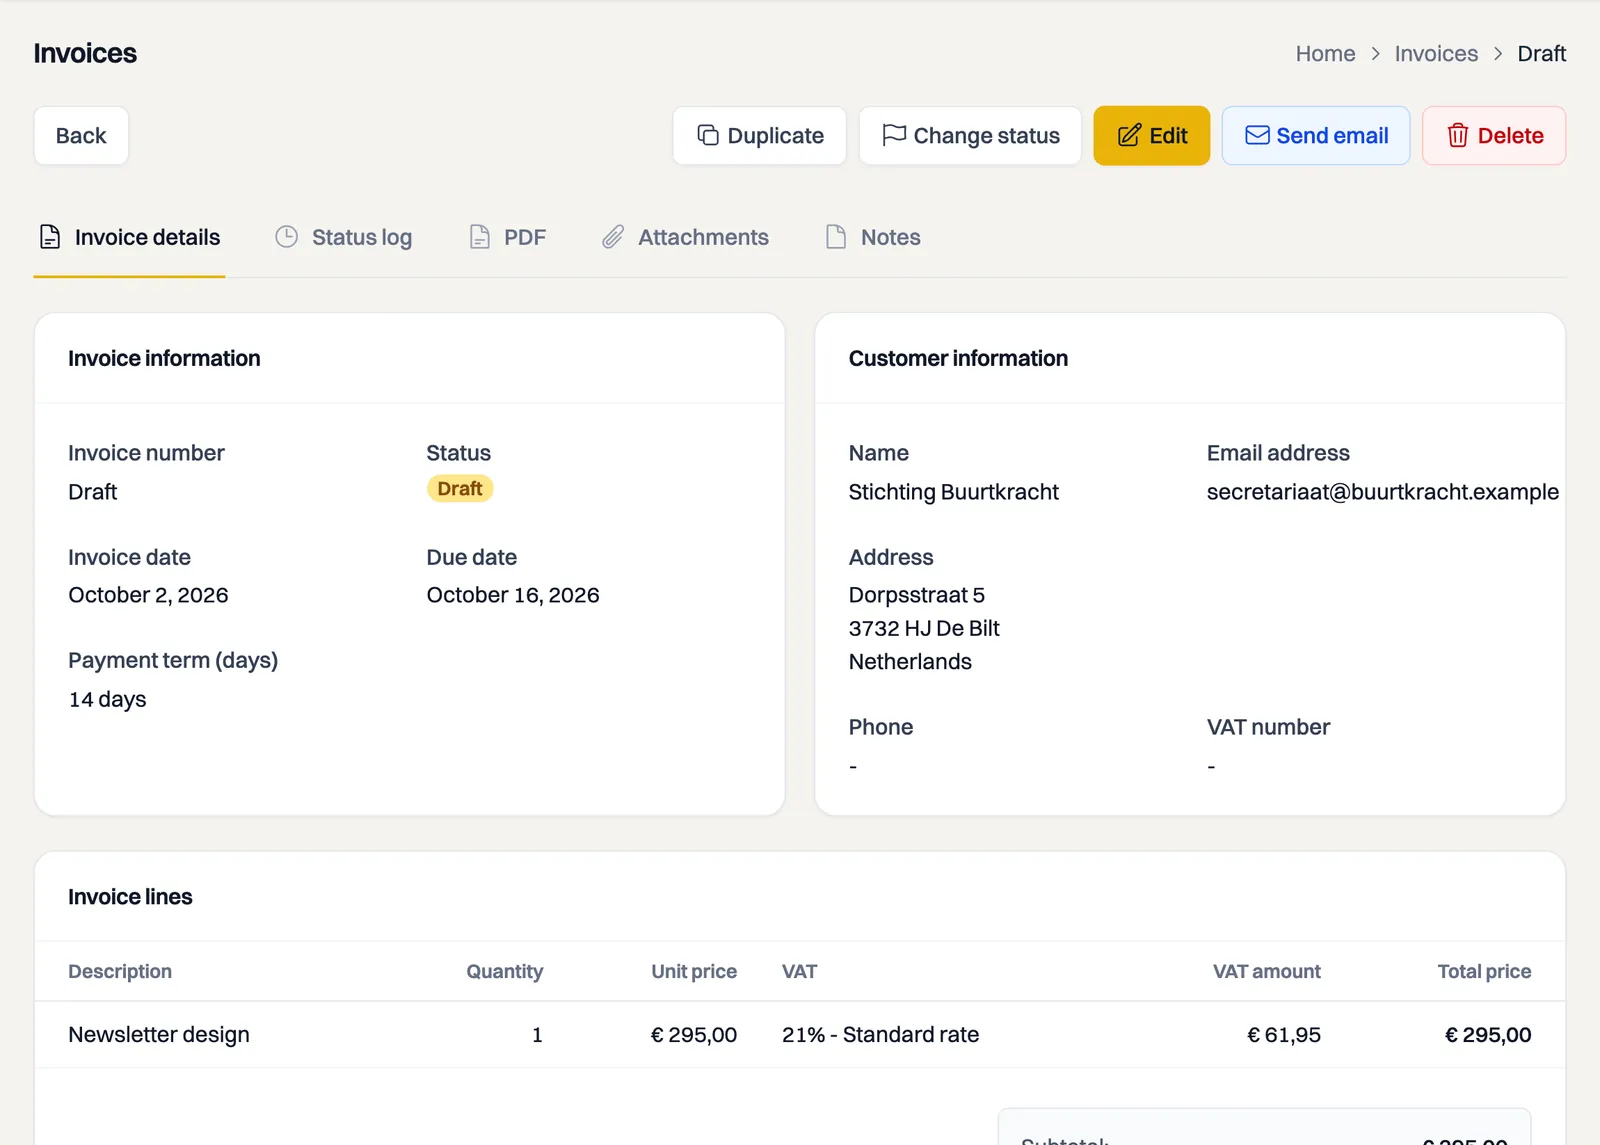
Click Create. Milo saves the invoice with status Draft and opens the invoice. Where the invoice number will go you see Draft for now: the invoice only gets that number when you send it. See the article on invoice numbers and number series.
Sending the invoice
On the invoice you click Send email. Your customer then receives an email with a secure link (with a PIN) to view the invoice, and the status changes to Pending. What your customer sees on that page — entering the PIN and viewing or downloading the invoice — is covered in the article on viewing an invoice or quote online. Under the tabs you also find the PDF to view or download, a Status log with the history, and the Edit and Delete buttons.
Still stuck? Ask Milo via the chat in the bottom right, or email [email protected].