You create a Milo account in a few minutes. You enter your name, email address and a password, then confirm your email address and sign in. The first time you sign in (log in) you set up your company, after which you can manage invoices, quotes and customers. A new account starts with 60 days free on the Professional plan, without a credit card.
Invited by a colleague?
If someone at your company already works in Milo, you do not create an account yourself. The account owner invites you under Settings > Users, and you receive an email with an invitation link. You set your own password there and can sign in straight away, without confirming your email address first. You then land in the same administration as your colleagues. An invitation is valid for 14 days; see the article on inviting colleagues.
The rest of this article covers creating a new account for yourself.
Entering your details
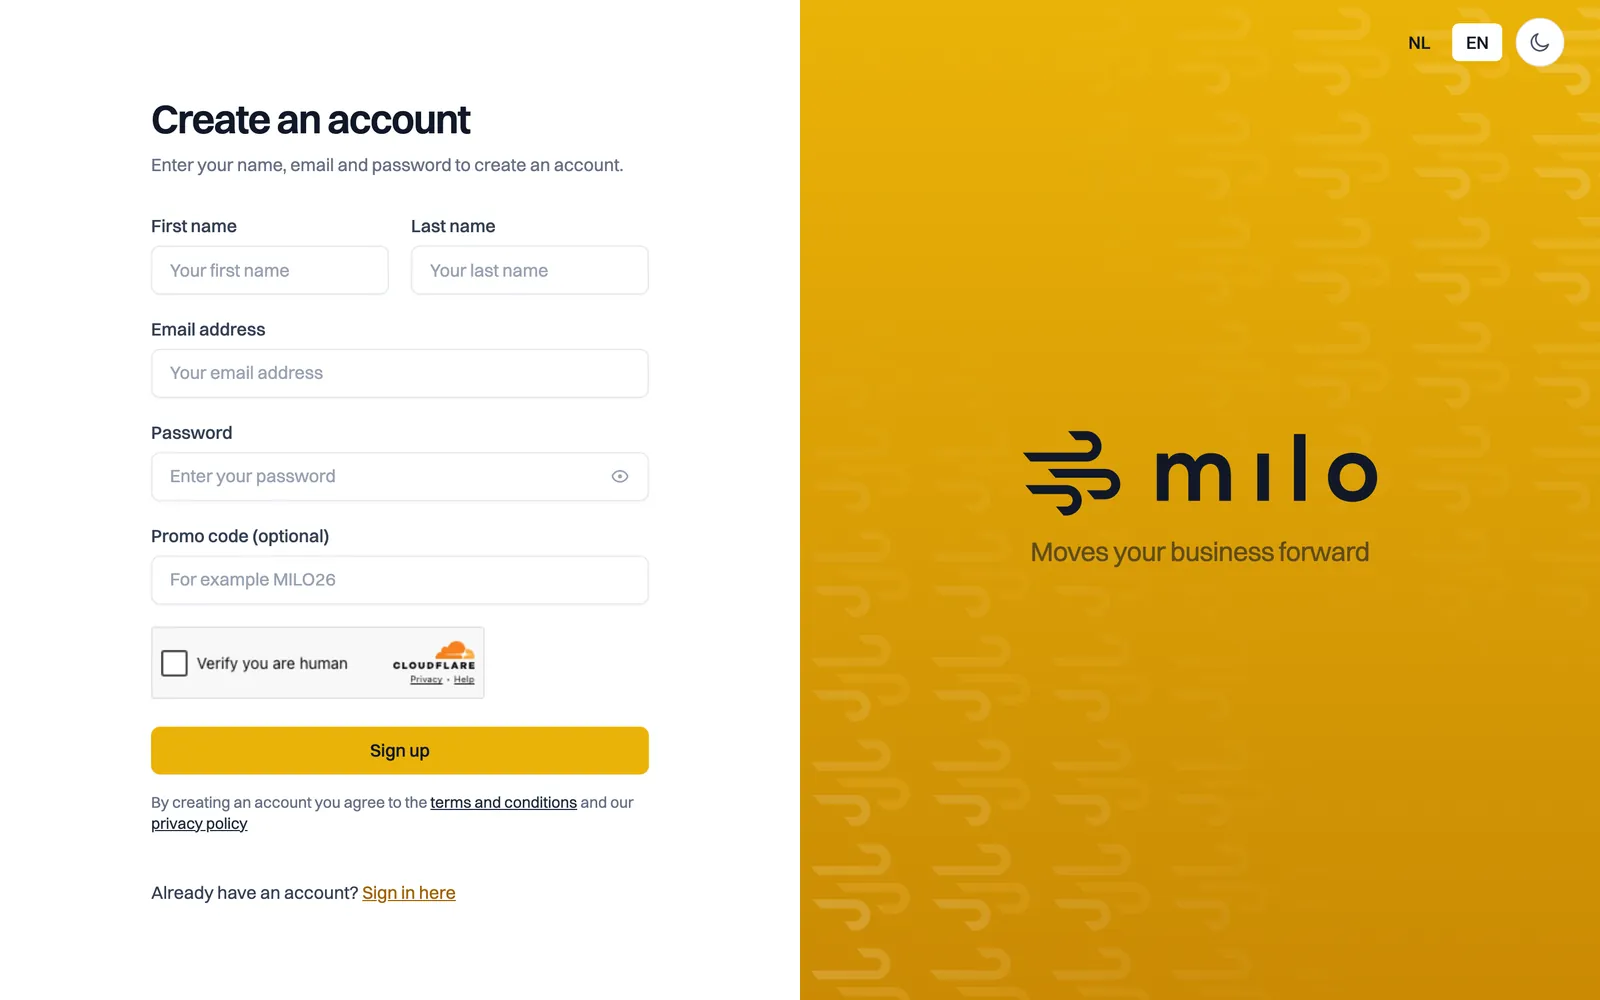
- Open the sign-in page and click Sign up at the bottom, under "Don't have an account yet?".
- Enter your First name and Last name.
- Enter your Email address. You will use this address to sign in later.
- Choose a Password. As you type, a strength indicator appears that runs from weak to strong. Choose a password that scores at least "Good".
- If you have a Promo code, enter it. This field is optional; if you arrived through a partner link, the code is usually there already. See the article on redeeming a discount code.
- If a security check ("Verify you are human") appears, confirm it. This step blocks automated sign-ups.
- Tick I agree to the terms and conditions and the data processing agreement, and I have read the privacy policy. Each document has a link.
- Tick I act as a business or on behalf of an organisation. Milo is business software, so we record that you are registering as a business.
- Click Sign up. If you tick only one of the two boxes, you get "Tick both boxes to create an account" and the sign-up does not go through.
Which version of the terms and the data processing agreement you accepted is stated in the email you get next. Under Settings > Subscription you can also look up later which version you accepted, and when. See the article about our terms and the data processing agreement.
Confirming your email address
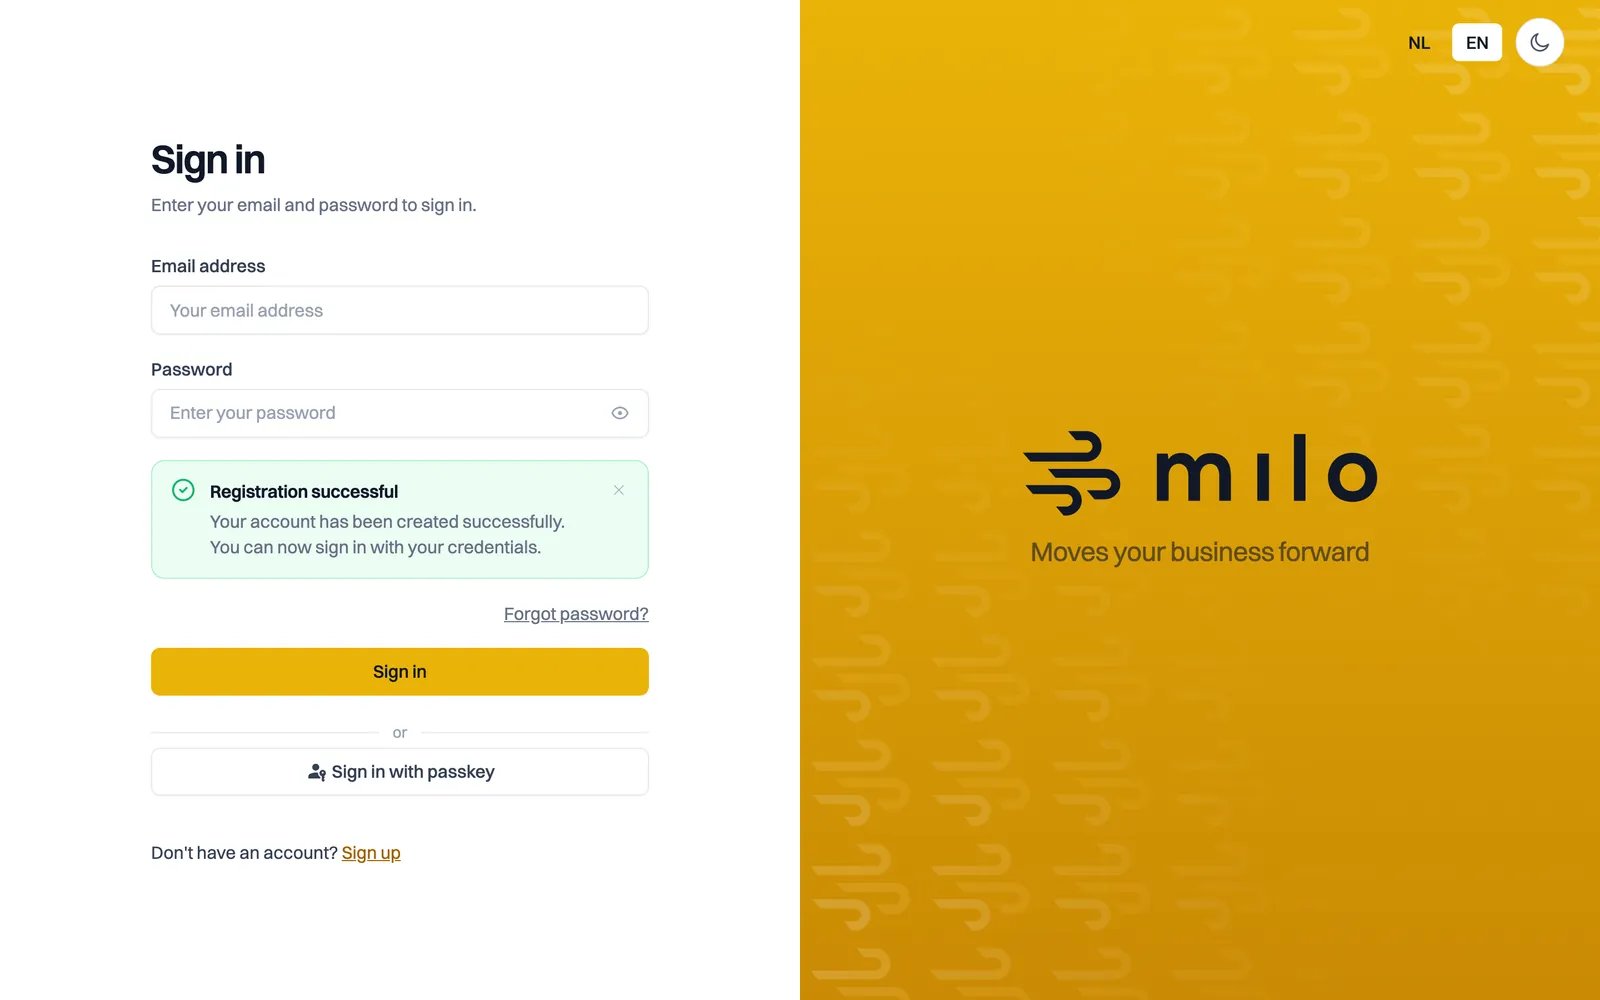
After creating your account you return to the sign-in page with the message "Registration successful". Milo also sends you an email with the subject "Confirm your email address".
- Open the email and click Confirm my email address.
- No email? Check your spam folder first. You can also request a new one on the confirmation screen with Resend verification email.
If you sign in before confirming your email address, Milo shows the "Confirm your email address" screen. You complete that confirmation before continuing.
Signing in
Go to the sign-in page, enter your Email address and Password and click Sign in. If you want to sign in faster and without a password from now on, you can set up a passkey later.
Next: setting up your company
The first time you are signed in, Milo asks you to create a company. Milo uses this company for your invoices, quotes and customers. You can read how to fill it in in the article on setting up your company.
Still stuck? Ask Milo via the chat in the bottom right, or email [email protected].