Customer groups are part of Professional. You also have them during your trial, because that runs at Professional level. On Starter, Customer groups still appears in the menu, but opens a window pointing you to the plans.
Customer groups let you organise your customers into groups, for example "VIP customers", "Private clients" or a group per industry. Each group has a name, a colour and an optional description, so you can recognise and filter customers quickly. You find them under Customer groups in the menu.
Creating a customer group
- Go to Customer groups and click Create customer group.
- Enter a Name (for example "VIP customers").
- Optionally add a Description.
- Pick a Colour to recognise the group visually.
- Click Save. The group appears in the overview.
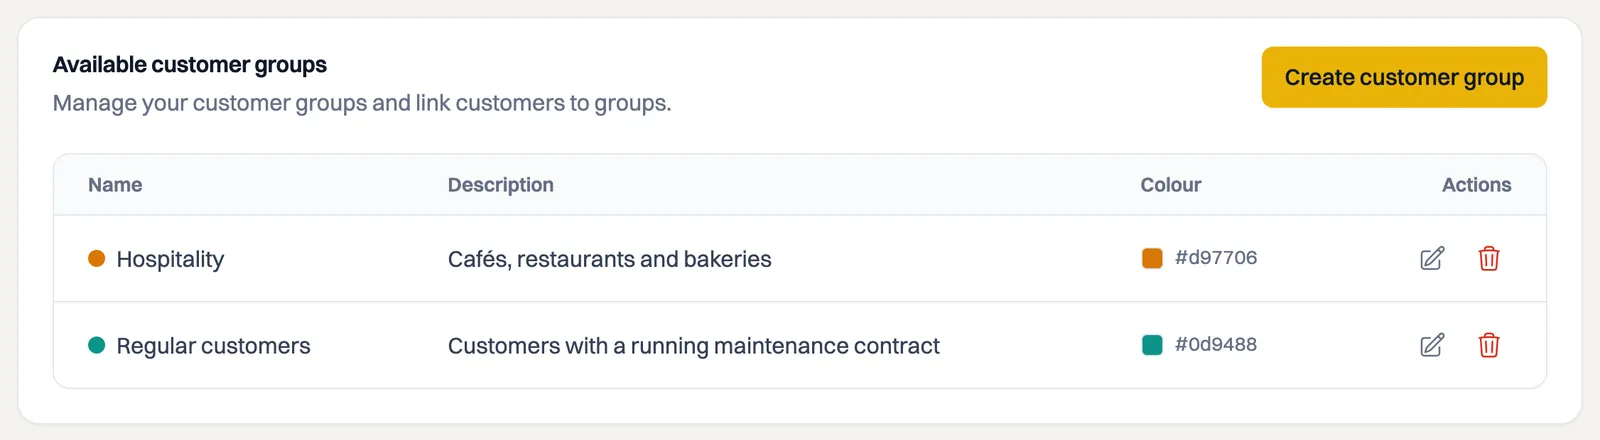
If you don't have any groups yet, the Create your first customer group button helps you get started.
Linking customers to a group
The fastest way to link customers is in bulk from the customer overview:
- Go to Customers and select the customers you want to group by ticking their checkboxes.
- Click Link customer group.
- In the dialog, choose the group you want to link the selected customers to.
- Click Link group. The customers are added to the group in one go.
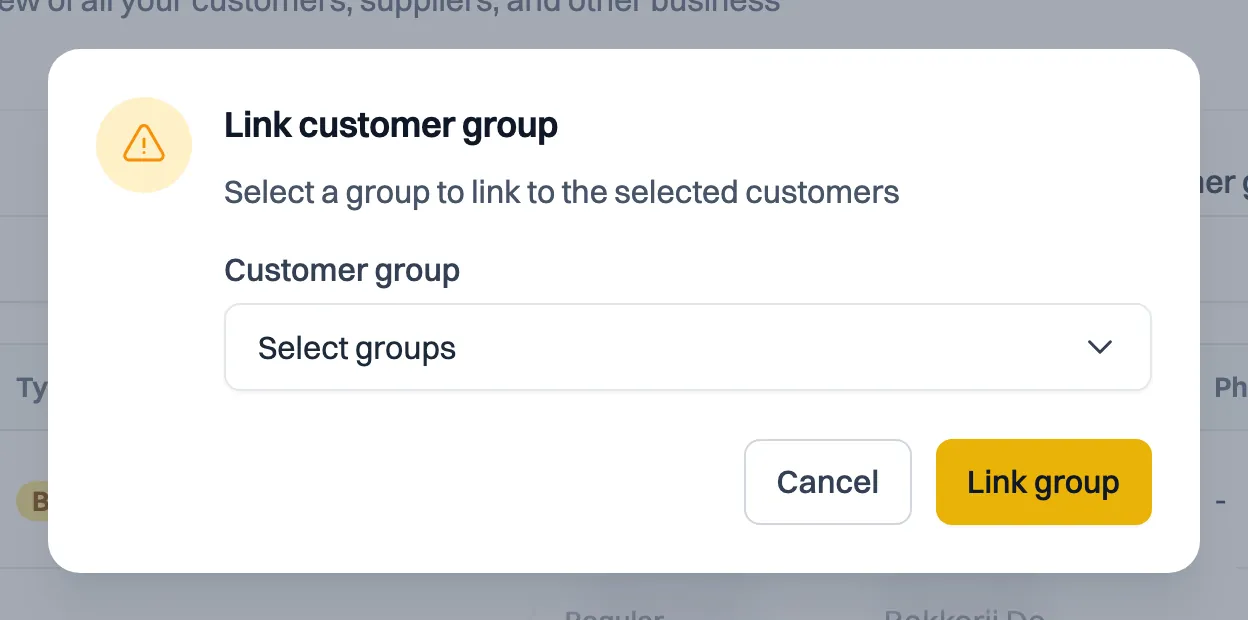
A customer can belong to several groups at once. In the same way, you can remove selected customers from a group again. You can also pick a group per customer via the Groups field in the customer form; see the article on managing customers.
Editing or deleting a customer group
In the overview under Customer groups, open a group via Edit customer group to change the name, description or colour. Use Delete customer group to remove a group. The customers themselves remain; only the group link is removed. Deleting cannot be undone.
Still stuck? Ask Milo via the chat at the bottom right, or email [email protected].